
In my training classes, students often can easily understand the benefits of validation attributes in their MVC Core application’s Model classes, as far as their use on individual model properties (Examples in this article are using MVC Core 3.1.1 on Visual Studio 2019)

What you buy yourself here is client-side validation, as long as you include the jQuery validation script in the page. A look at your browser’s F12 tools will reveal some extra attributes added to the elements that display the model’s properties, starting with data- (Following the “new” HTML standard for adding extra attributes to an element. Learn more from Mozilla here)

This is what jQuery.validate hooks into that ultimately will allow you to show error messages in the browser, and keep the page from posting back to the server if there are one or more validation fails.
Additionally, these attributes let us call validation in our server-side action methods, using the Controller’s ModelState object. The IsValid function returns a boolean indicating the success of validation. Again, one validation error causes a return of false. You can use the ModelState‘s Errors collection to loop through and get information about each individual error

Where the use of validators becomes less clear is how to do something more complex than what’s allowed by the Required, Range, StringLength or RegularExpression attribute classes available out of the box. For example, maybe a name needs to be validated against a list of names from a database. Or we need to vet a value relative to another property value. For example, our sample travel application above should probably ensure that the Leave date is today or later, and that the Return date is after the Leave date.
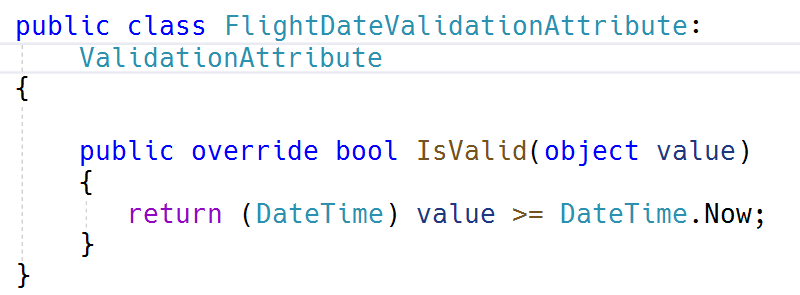
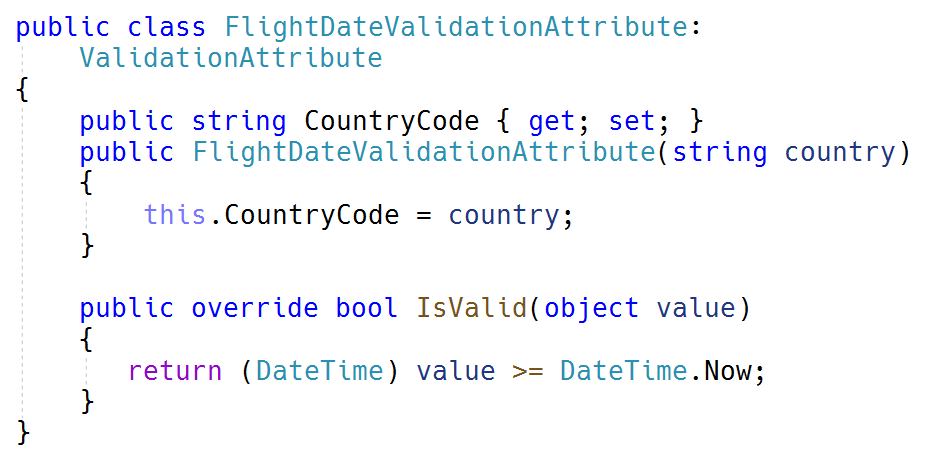
So we can design our own validation attribute by inheriting from the ValidationAttribute class, and overriding one of the IsValid method overloads.
The simplest example is the version that takes an object parameter named value, representing the proposed value of the property. Create whatever custom routine you require, and return true or false to indicate your Valid/Not Valid state. This version of the function limits you to only validating using the single model property that the attribute is attached to.
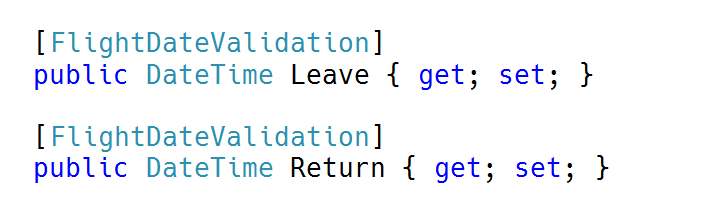
This validator could then be attached to both the Leave and the Return properties in the Model class.
For our sample case of wanting to validate to make sure Return is after Leave, though, we need to use the overload with the (object, ValidationContext) signature. That second parameter gives you access to an ObjectInstance variable that represents your model class.
Cast ObjectInstance to the model’s type and you can create whatever validation routine you need, again returning the Valid/Not Valid result as a boolean, but using any other property(ies) from the class.
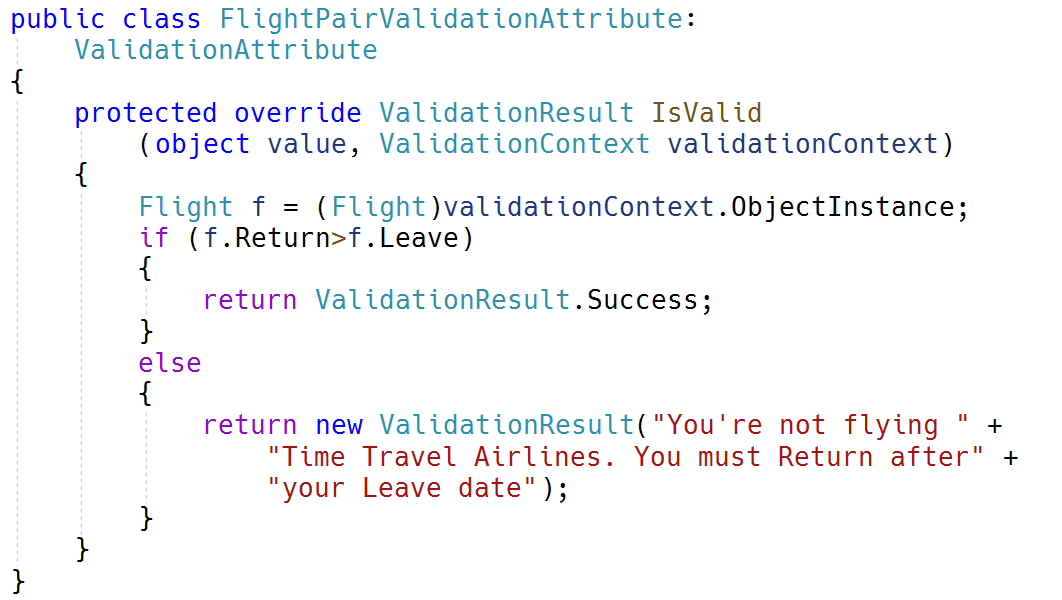
The syntax for returning the result takes just a little getting used to. You’d expect there to also be an enum member like ValidationResult.Failure, given the Success case. But if you want to return an error, you create (or use an existing) ValidationResult object. The string you supply becomes the error message.
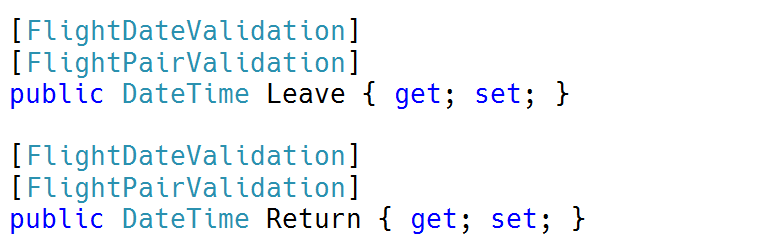
Once created and tested, your custom validation attribute behaves exactly like the out-of-the-box versions. In our case we want both validators to remain, so that we validate for both of our business requirements (Flight is in the future, and Return date is after Leave date)
Finally, a tip: If you add a constructor to the validation class that requires a parameter, users of the attribute are required to pass the appropriate value when they use the attribute. (Note that the validator without the parameter is now showing as errored)

No Comments Yet